What are The Different Types of Skin Analysis?

Understanding your skin starts with the basics—skin types—and gets smarter with modern skin analysis. In this guide, we pair everyday observations (normal, oily, dry, combination, sensitive) with non-invasive bioengineering: imaging systems like multispectral facial analyzers, dermatoscopes, RCM/OCT/HFUS, and 3D profilometry, plus biophysical measurements such as hydration, sebum, elasticity, TEWL, pH/colorimetry, and microcirculation.
Skin Types
|
Skin Type |
Key Characteristics |
Common Concerns |
Care Focus |
|
Normal |
Balanced oil–water; smooth texture |
Occasional dullness |
Gentle cleanse, basic hydrate, daily SPF |
|
Oily |
Excess sebum; shine; enlarged pores |
Breakouts, blackheads |
Oil control, non-comedogenic hydrate, regular exfoliation, SPF |
|
Dry |
Low moisture; rough/flaky; tight feel |
Sensitivity, fine lines |
Barrier repair, richer moisturizers, gentle cleanse, SPF |
|
Combination |
Oily T-zone; drier cheeks |
Mixed concerns by zone |
Zone-specific care, lightweight hydrate, balanced exfoliation, SPF |
|
Sensitive |
Easily irritated; redness/itch/sting |
Reactive to products/climate |
Minimalist routine, soothing ingredients, avoid fragrances, SPF |
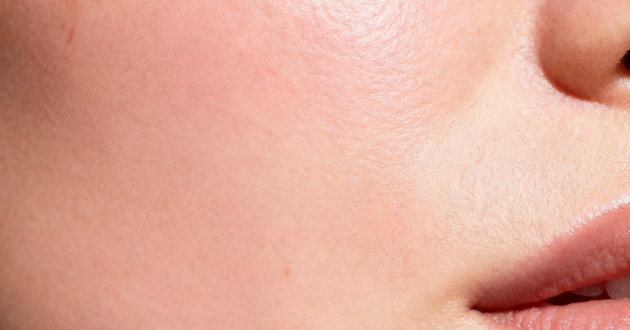
Normal Skin
How to identify. Skin feels comfortably balanced from morning to night—neither shiny nor tight. Pores remain fine and unobtrusive, texture looks even, breakouts are rare, and most products don’t cause tingling.
Care strategy. Keep intervention light: preserve the current balance and protect against future stressors. Cleanse gently once or twice a day with a low-foam formula, layer a lightweight humectant and a sheer lotion, and wear broad-spectrum SPF 30+ daily. For long-term upkeep, add an antioxidant and a mild retinoid a few nights a week.
Look for. Niacinamide (2–5%), panthenol, ceramides, hyaluronic acid, squalane, and vitamin C (ascorbic acid or stable derivatives).
Avoid/limit. Aggressive scrubs and frequent high-strength acids that can throw the skin off balance.
Sample routine. AM: gentle cleanse → antioxidant serum → light moisturizer → SPF 30+. PM: cleanse → simple hydrator → light moisturizer; retinoid 2–3×/week.

Oily Skin
How to identify. T-zone shine returns a few hours after washing. Pores look larger, blackheads and congestion are common, and breakouts occur more easily.
Care strategy. Control sebum without compromising the barrier. Use a pH-balanced gel cleanser (double cleanse at night if you wear sunscreen or makeup), follow with a water-light gel moisturizer, and micro-dose leave-on exfoliants to keep pores clear. Finish with a non-comedogenic gel or matte SPF.
Look for. BHA/salicylic acid 0.5–2%, niacinamide 4–10%, azelaic acid 10%, zinc PCA, green tea; occasional kaolin/bentonite masks; retinoids for long-term texture and oil management.
Avoid/limit. Stripping toners, alcohol-heavy formulas, and over-washing that triggers rebound oil.
Sample routine. AM: gel cleanse → niacinamide or BHA → gel moisturizer → matte SPF 50. PM: oil cleanse if needed → gel cleanse → BHA or azelaic acid → fluid moisturizer; add retinoid 3–5×/week as tolerated.

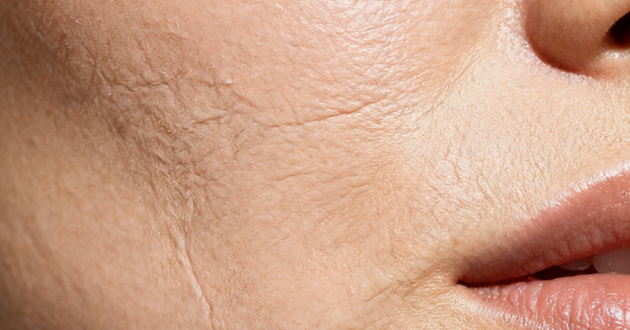
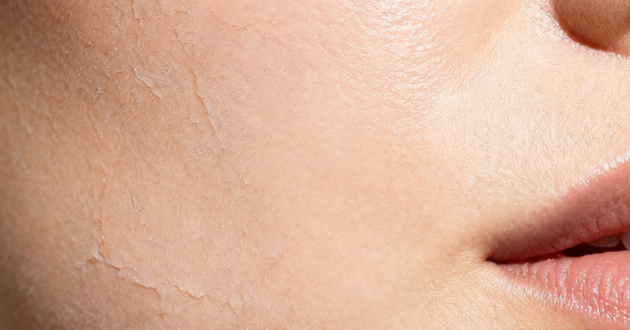
Dry Skin
How to identify. Skin feels tight after cleansing, with rough patches and visible flaking or dullness. Fine lines stand out when dehydrated, and shine is minimal all day.
Care strategy. Reduce TEWL and rebuild lipids. Choose a cream or milk cleanser, then layer a humectant serum beneath an emollient cream; add an occlusive at night on the driest areas. Support with simple environmental tweaks—use a humidifier, keep water lukewarm, and shorten showers.
Look for. Ceramide–cholesterol–fatty acid blends, glycerin, urea 2–5%, hyaluronic acid, panthenol, squalane, shea butter; low-dose lactic acid (≤5%) 1–2×/week for smoothness.
Avoid/limit. High-strength acids, frequent exfoliation, alcohol-heavy toners, hot water, and drying clay masks.
Sample routine. AM: cream cleanse (or water rinse) → hydrating serum → rich cream → SPF 30+. PM: cream cleanse → hydrating serum → barrier cream → optional occlusive on flaky spots.
Combination Skin
How to identify. The forehead, nose, and chin are oily with visible pores, while the cheeks feel normal to dry. Concerns shift with weather or hormones—shinier in summer, tighter in winter.
Care strategy. Treat by zone for balance. Keep lightweight gels or lotions overall and reserve richer creams for dry areas. Use pore-clearing actives on the T-zone and barrier-strengthening steps on the cheeks.
Look for. Niacinamide for all-over balance, BHA just on the T-zone, azelaic acid for tone and texture, low-percentage lactic acid on dry patches, and ceramides for the cheeks.
Avoid/limit. Heavy creams or strong AHAs applied uniformly; one harsh cleanser for the entire face.
Sample routine. AM: gentle cleanse → niacinamide all over → gel moisturizer → SPF 50. PM: cleanse → BHA on T-zone + hydrating serum on cheeks → lightweight lotion overall; richer cream only on dry spots; retinoid 2–4×/week.
Sensitive Skin
How to identify. Redness, stinging, itching, or burning with common products or weather changes. Sensitivity can coexist with any other skin type.
Care strategy. Minimize triggers and fortify the barrier. Use an ultra-mild, fragrance-free cleanser with short contact time, simplify ingredient lists, patch test new products, and favor mineral filters for sun protection.
Look for. Centella/madecassoside, panthenol, ceramides, cholesterol, colloidal oatmeal, allantoin, squalane, bisabolol, ectoin, and low-percentage azelaic acid; soothing thermal waters can help.
Avoid/limit. Fragrance (including essential oils), high-level acids, frequent scrubs, and aggressive retinoids; introduce actives one at a time and keep strengths low.
Sample routine. AM: ultra-gentle cleanse → soothing serum → ceramide cream → mineral SPF 30–50. PM: gentle cleanse → barrier serum (panthenol/ectoin) → rich, fragrance-free cream; add mild actives only after stability returns.
Non-invasive Bioengineering Methods for Skin Analysis
Skin Analysis Equipment — Imaging Systems
When you evaluate skin analysis equipment, imaging systems explain the “why” behind probe numbers. Below, each modality is summarized with practical use-cases, outputs, and buying notes so you can match the technology to your workflow.
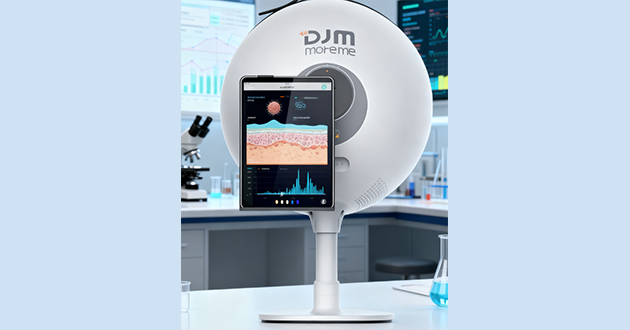
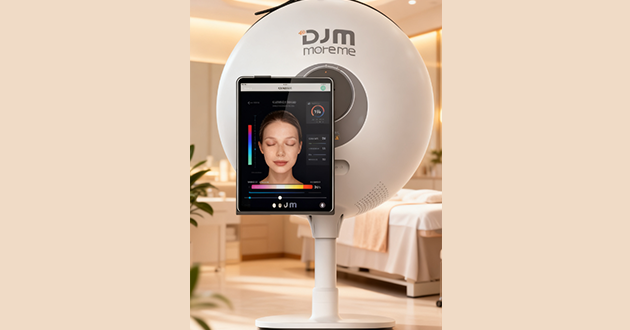
Multispectral Facial Analyzers
What they do. These systems standardize skin analysis with visible, cross-polarized, parallel-polarized, and UV captures under fixed lighting and head positioning. The result is a set of comparable images and scores for spots, redness, porphyrins, pores, and wrinkles—ideal for establishing a baseline and tracking change over time.
Best for. Day-to-day consultations, treatment planning, and progress reviews in clinics, medi-spas, and beauty counters.
Outputs. Multi-angle photos, condition heatmaps, cohort percentile scores, and clean client reports that translate data into plain language.
Strengths. Fast and repeatable, with visuals that make skin analysis findings easy to explain and act on.
Limits. Scores reflect relative risk or prevalence—not a diagnosis—and vendor algorithms differ.
Pro tips. Keep a consistent room setup (lighting, camera distance, posture), clean lenses weekly, and follow the calibration schedule. A short “no makeup, 10–15 min acclimation” policy improves consistency.
Why it matters for skin analysis equipment. It connects objective capture with persuasive visuals, helping decisions feel both evidence-based and client-friendly.
Dermatoscope
What it does. A handheld scope—polarized or non-polarized—that gives close-up views of pores, comedone type, superficial pigment, and fine vasculature in real time, adding clinical texture to your skin analysis.
Best for. On-the-spot checks, acne typing, and quick verification of what broader imaging suggests.
Outputs. Crisp magnified images; many models dock to smartphones for documentation and follow-up.
Strengths. Portable, affordable, immediate—an agile companion to larger skin analysis equipment.
Limits. Shallow imaging depth; results depend on technique; standardization can be tricky.
Pro tips. Train for consistent contact pressure and angle. Use immersion fluid or contact plates when appropriate to reduce glare and improve contrast.
RCM / OCT / HFUS
What they do.
RCM (reflectance confocal microscopy) offers near–cell-level, en-face views of the epidermis and superficial dermis.
OCT (optical coherence tomography) delivers non-invasive cross-sections that reveal micro-architecture and subtle edema.
HFUS (high-frequency ultrasound) measures dermal thickness, echogenicity, and fluid shifts.
Best for. Research settings and advanced clinics assessing texture change, inflammation, or post-procedure recovery without biopsy—where depth-resolved skin analysis is essential.
Outputs. High-resolution structural data that corroborate or explain surface findings.
Strengths. Objective insight into epidermal–dermal structure; strong endpoints for protocols and publications.
Limits. Higher cost, steeper learning curve, and longer scan times.
Pro tips. Standardize scan sites, depth, and averaging; pair with calibrated photography so structural changes map cleanly to what the eye sees.
Role within skin analysis equipment. Provides the “under-the-surface” evidence that complements surface imaging and biophysical metrics.
3D / Profilometry
What it does. Maps facial topography to quantify wrinkle depth, surface roughness, and scar elevation/depression—turning “looks smoother” into numbers your skin analysis can track.
Best for. Anti-aging programs, scar management, and device/ingredient trials where small, measurable changes matter.
Outputs. Color-coded relief models, trackable regions of interest, and statistics suitable for reports or publications.
Strengths. Highly reproducible with fixed pose and lighting; sensitive to subtle texture improvements.
Limits. Requires strict positioning and sometimes facial markers; setup takes longer than a snapshot.
Pro tips. Use headrests and pose checkers, lock camera settings, and measure at the same time of day to minimize swelling bias.
Why this skin analysis equipment stands out. It converts visual impressions into defensible metrics, closing the loop between perception and proof.

Biophysical Measurement in Skin Analysis
Hydration. Capacitance/conductance sensors read the skin’s dielectric properties to estimate stratum corneum water. Low values indicate dryness and a fragile barrier, and they typically improve within hours to days after moisturizers—making hydration a sensitive marker for product impact and seasonal change. Consistency tips: acclimate 10–15 minutes, use the same site with light pressure, and pair results with TEWL to distinguish “dry” from “leaky.”
Sebum. Meters quantify surface lipids to map shine-prone zones and assess cleansers, mattifiers, or routine tweaks. Because timing and prep affect readings, standardize cleansing and contact time, and avoid sunscreen or occlusives on the test area so the skin analysis reflects true oil output.
Elasticity/Firmness. Suction (cutometry) or vibration (ballistometry) capture viscoelastic behavior—how skin deforms and rebounds. Metrics such as Ue, Uf, and Ur reveal changes linked to age, hydration, or inflammation. Keep facial muscles relaxed, control probe seal/pressure, and test at a consistent time of day for trend-worthy skin analysis.
TEWL (Transepidermal Water Loss). TEWL reports passive water vapor flux (g/m²/h) as a proxy for barrier integrity. Higher values suggest irritation or compromise and respond quickly in barrier-repair studies. Measure in a draft-free, stable room, allow the probe to equilibrate, and interpret TEWL alongside hydration for a fuller picture.
pH / Colorimetry. Surface pH (~4.5–5.5) reflects the acid mantle, while L*a*b* colorimetry yields melanin and erythema indices to track pigmentation and redness. Take pH before actives or after a fixed post-cleanse interval; for colorimetry, test on bare skin and control shadows and angle to avoid skewed results.
Temperature / Microcirculation. Infrared thermography maps surface temperature, and laser Doppler or video capillaroscopy visualizes blood-flow dynamics and vessel patterns. These tools help monitor inflammation, post-procedure recovery, and vasoreactivity. Ensure thermal acclimation, avoid recent heat/cold exposure or exercise, and record room conditions to keep skin analysis datasets consistent.
Conclusion
Great skin care blends insight with evidence. By combining skin-type cues with imaging-focused skin analysis equipment and targeted biophysical metrics, you can track change over time and choose products or treatments with confidence. Keep conditions consistent (lighting, timing, acclimation) to make comparisons fair, and seek professional guidance if something looks or feels off.
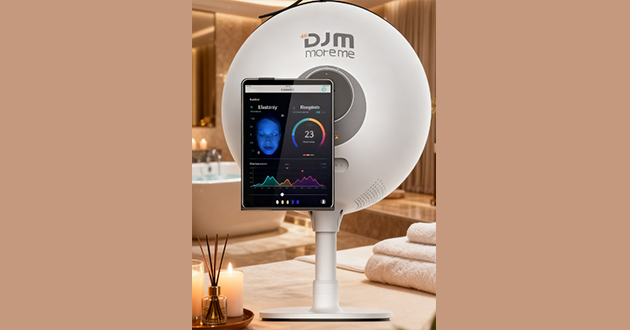
Table of Contents
Related information


How can we help you?
Have specific questions or requests? Fill out our inquiry form, and our dedicated team will get back to you promptly. Your inquiries are important to us, and we are committed to providing comprehensive and personalized responses tailored to your needs.


 Reach out to us today!Whether you are preparing to start your own
business in the beauty industry, are ready to upgrade your
equipment, or are just interested in our products,Contact us
today, and let’s explore how we can partner to achieve your goals
and drive your success to new heights!
Reach out to us today!Whether you are preparing to start your own
business in the beauty industry, are ready to upgrade your
equipment, or are just interested in our products,Contact us
today, and let’s explore how we can partner to achieve your goals
and drive your success to new heights!